As a yoga teacher and naturally flexible person, people often tell me that they don’t practice yoga because they’re not flexible. But that is why You practice yoga! One of my favorite poses for increasing flexibility is the seated forward bend, also known by its Sanskrit name. pashimottanasana. (Pronounced PAH-she-moh-ton-AHS-uh-nuh.)
A seated forward bend may not look like much in a single still image. But what you don’t see is what effect this stretch has on different parts of your body.
“Paskimottanasana “It stretches the entire backside of your body, which is a continuous chain of fascia and muscles,” says Stephanie Saunders, BODi’s vice president of fitness programming. many More than just a hamstring stretch.
Read on to learn how to master this beneficial basic pose.
Sitting forward bend (Paskimottanasana): Step-by-step instructions
- Start in Staff Pose. Sit tall on the floor with your legs extended in front of you, legs bent and toes pointing toward the ceiling. Place your hands on the floor on or beside your thighs.
- Pull your abdominal muscles inward, lean forward using your hips, not your hips, and slowly walk your hands from your feet toward your feet. Avoid arching your back too much or using your arms to pose.
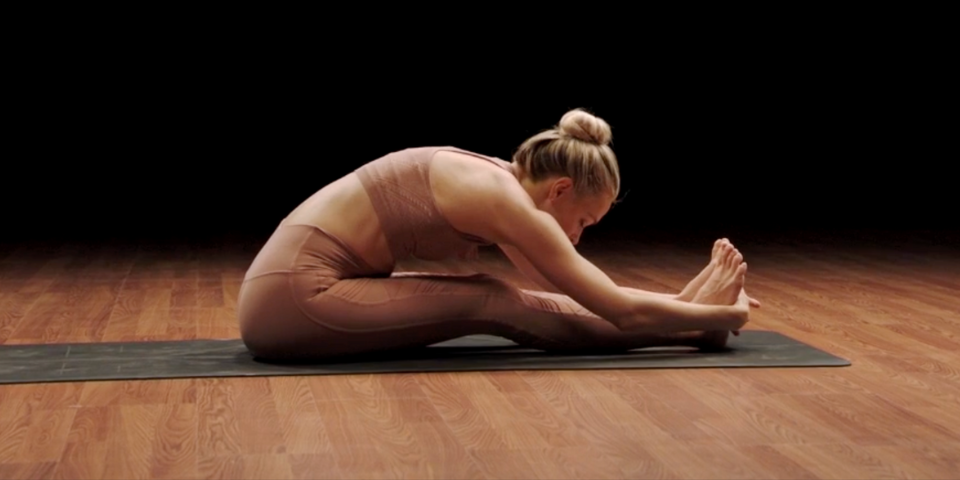
- Rest in the pose by grabbing your big toe, side of your foot, shin, and ankle as gently as your flexibility allows, keeping your spine neutral.
- Continue breathing for at least 5 times. With each exhale, relax, straighten your posture, and stretch deeper.
How to make forward bending easier while sitting
Paskimottanasana This is an intense stretch that anyone can do comfortably, even beginners. Modifying the seated forward bend does not reduce its benefits, but rather makes them more accessible.
- “If you have tightness in your hamstrings or hips, you may need to elevate your hips (by sitting on a yoga block or folded blanket) or bend your knees to loosen your hips,” says Sanders.
- “If you have a stiff back, lengthen your spine and reach before relaxing forward, using blocks on either side of your knees to support your arms, and let gravity do the rest,” she says.
- You can also separate your legs so that your heels are hip-width apart. This will give you more room in your chest and abdomen.
How to strengthen your forward bend while sitting
A seated forward bend is an intense stretch for your back. If you have flexible hamstrings and no back pain, it is possible to strengthen your posture.
- You can strengthen your hamstring stretch by stretching your legs and flexing your toes.
- Deepen the stretch by holding a yoga block against the soles of your feet.
Beginner tips for performing seated forward bends
Paskimottanasana It’s not about depth. Many beginners think that to “achieve” this pose you need to keep your legs straight and bring your nose closer to your knees.
In reality, it’s safer and just as “correct” to keep your spine neutral and your knees bent. Rounding your spine in an attempt to bring your nose closer to your knees can cause back pain and pressure. Instead, focus on keeping your upper body on top of your thighs.
When you begin practicing seated forward bends, it’s important to listen to your body and breathe. If you can’t maintain your posture after three long breaths, you may be breathing too deep or too fast. Take your time to find your depth in this pose. Stay, breathe, and deepen.
Benefits of seated forward bending
Paskimottanasana Although it is a simple pose, it has various effects.
- Stretch the back of your body from your heels to your head
- Helps promote spine elongation
- Create inner calm through breathing
Variations of seated forward bend
If you’re looking for other types of bends that offer a slightly different stretch, try some of these below.
1. Standing forward bend (Uttanasana)
- Start on your mat in Mountain Pose. Inhale and raise your arms straight up, rotating your triceps forward. Exhale, bend at the waist and reach towards the floor.
- Bend your knees slightly, fold your torso over your legs, and extend your spine down.
- Place your fingertips or palms on the floor, with your fingers in line with your toes.
- Look at your legs. Spiral your shoulders to the sides and away from your ears.
- Lift the arch of your foot. Stabilize your leg by lifting your kneecap.
- Lift your tailbone toward the ceiling while rotating your thighs inward.
- Shift your weight slightly forward on your feet so your hips are over your heels.
- If possible, start stretching your legs.
2. Pose with narrowed corners (baddha konasana)
- Sit on the floor with your butt bone directly below you. (This way you won’t push your tailbone in.)
- Bring the soles of your feet together and fold your knees to the sides. Make sure the outsides of your feet are touching.
- Bring your heels as close to your groin as is comfortable.
- Place your thumb on the ball of your foot and wrap your remaining fingers around the top of your foot like you’re holding an open book.
- Keep your back tall and fall forward without rounding your back too much or rolling your knees forward. Hold for at least 5 breaths or up to 1 minute.
3. Bend your legs forward while sitting (Upavistha Konasana)
- Start in Staff Pose. Sit tall on the floor with your legs extended in front of you, legs bent and toes pointing toward the ceiling. Place your hands on the floor on or beside your thighs.
- Spread your legs as wide as possible, bend your feet and point your toes toward the ceiling.
- Be careful not to round your back, bend at the waist and slowly walk your hands forward. Press and hold for 30-60 seconds.